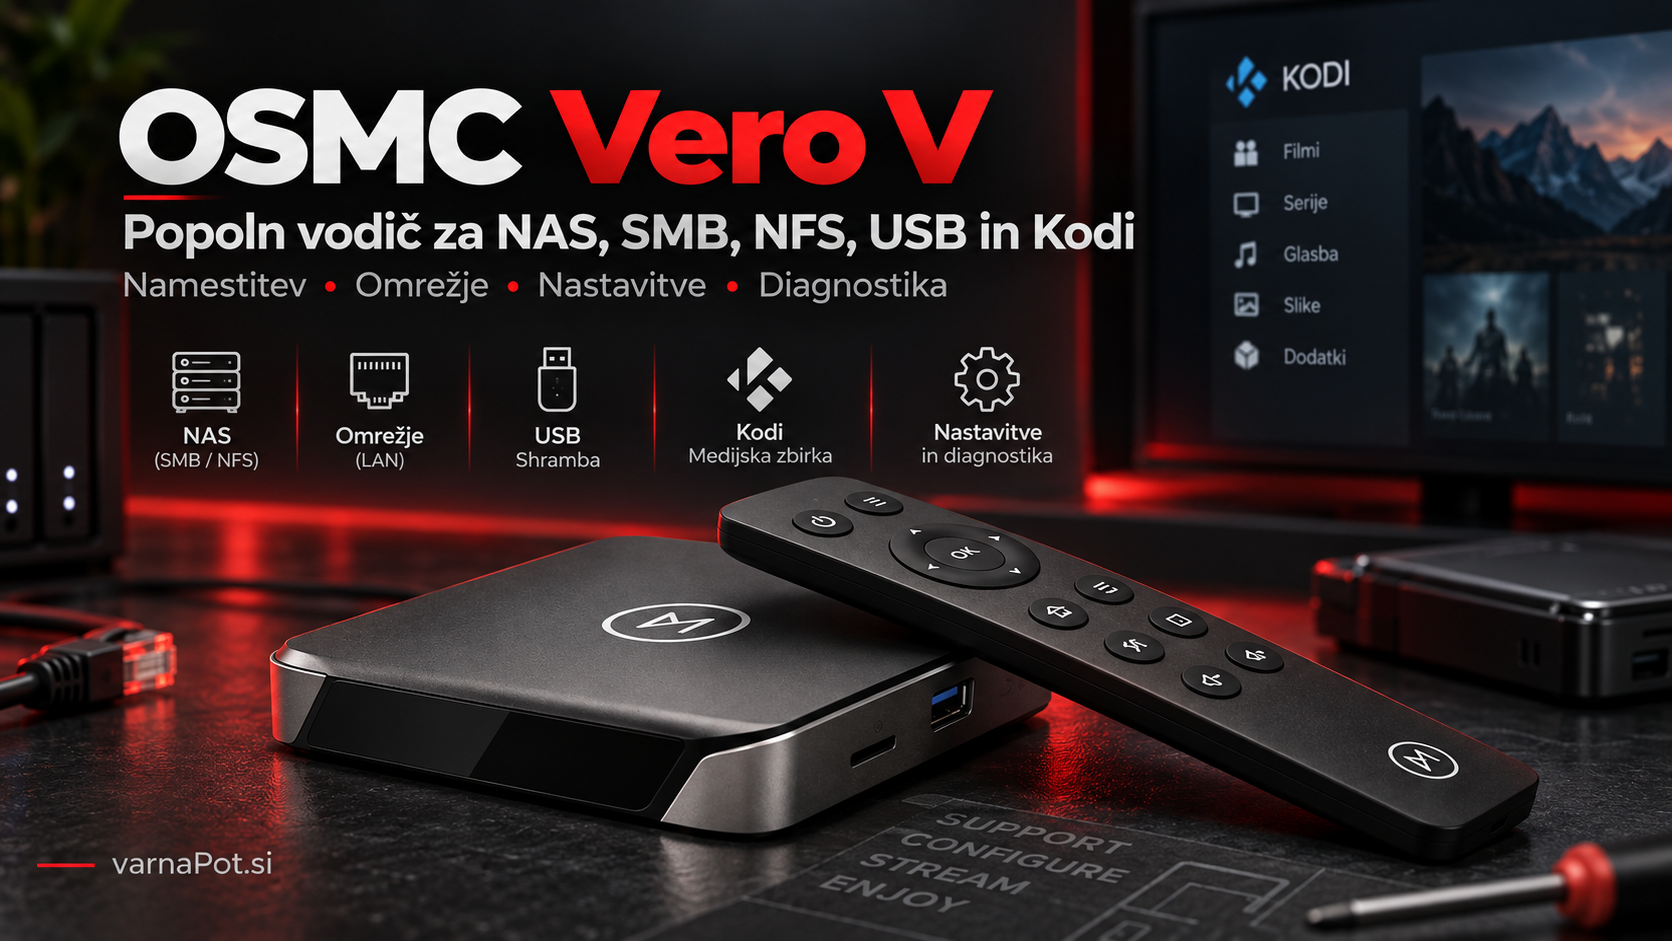
Od prvega zagona do napredne domače kino postavitve: v tem vodiču so zbrana praktična navodila za OSMC Vero V, omrežne diske, NAS strežnike, zunanje USB diske, Kodi, Dolby Atmos, Dolby Vision, HDMI-CEC, varnostne kopije in odpravljanje težav.
Vero V je mogoče uporabljati zelo preprosto: priključimo ga na televizor, dodamo medijsko mapo in začnemo predvajati. Njegova prava prednost pa je, da pod preprostim uporabniškim vmesnikom OSMC deluje popoln Linux sistem. Zato lahko z isto napravo zgradimo precej naprednejšo rešitev z NAS strežnikom, SMB ali NFS omrežnimi viri, avtomatskimi priklopi, AV-sprejemnikom, HD-avdio passthroughom in centralizirano Kodi knjižnico.
Ta članek je namenjen obema skupinama uporabnikov: začetnikom, ki želijo Vero V pravilno nastaviti, in naprednejšim uporabnikom, ki želijo iz naprave izkoristiti čim več.
Če Vero V šele spoznavate, priporočamo, da najprej preberete tudi naš predstavitveni članek:
→ OSMC Vero V – 4K HDR, Dolby Vision in Dolby Atmos medijski predvajalnik
1. Kaj priporočamo pred začetkom
Pred prvo resno konfiguracijo Vero V je dobro sprejeti nekaj odločitev, ki kasneje močno poenostavijo uporabo in odpravljanje težav.
Naša priporočena osnovna postavitev
Internet
   │
Router
   │
Gigabitno omrežno stikalo
   ├──────── NAS / strežnik
   │
   └──────── OSMC Vero V
                  │
                 HDMI
                  │
           AV-sprejemnik
                  │
                 HDMI
                  │
       4K HDR / Dolby Vision TV
Če AV-sprejemnika ne uporabljamo:
NAS → omrežje → Vero V → HDMI → TVPred konfiguracijo priporočamo
- Vero V posodobiti na aktualno različico OSMC,
- če je mogoče uporabiti Gigabit Ethernet,
- NAS-u in Vero V dodeliti stalni oziroma rezervirani IP naslov,
- spremeniti privzeto SSH geslo,
- filme in serije hraniti v ločenih mapah,
- uporabiti ločen NAS uporabniški račun za Vero V in
- po končani konfiguraciji narediti varnostno kopijo.
2. Prvi zagon in posodobitev OSMC
Po priklopu HDMI kabla, omrežja in napajanja se ob prvem zagonu prikaže začetni čarovnik OSMC.
Izberemo jezik, časovni pas, omrežje in ostale osnovne možnosti.
Po končanem prvem zagonu je ena prvih stvari, ki jih priporočamo:
My OSMC → Updates
in ročno preverjanje posodobitev.
OSMC redno izdaja posodobitve, ki poleg varnostnih popravkov prinašajo izboljšave Kodija, jedra, video podpore, omrežja, Dolby Visiona in drugih delov sistema.
Nasvet: pred večjo sistemsko posodobitvijo je smiselno narediti varnostno kopijo prek My OSMC.
3. Omrežje: Ethernet, Wi-Fi in stalni IP
Vero V ima Gigabit Ethernet in 802.11ac Wi-Fi.
Za običajno uporabo je lahko Wi-Fi popolnoma zadosten. Če pa predvajamo velike UHD Blu-ray remuxe ali imamo NAS, priporočamo žično povezavo.
Zakaj Gigabit Ethernet?
Pri videu ni pomembna samo povprečna bitna hitrost datoteke. Kratkotrajni podatkovni vrhovi so lahko precej višji.
Stabilna gigabitna povezava zato daje bistveno več rezerve kot 100-Mbit povezava ali slabši Wi-Fi signal.
DHCP reservation je praviloma boljši od ročnega statičnega IP-ja
Na Vero V lahko IP nastavite ročno, vendar pri domačem omrežju raje priporočamo, da na usmerjevalniku naredite DHCP reservation.
Primer:
NAS    → 192.168.1.20
Vero V → 192.168.1.50
Tako IP upravlja router, naprava pa vedno dobi isti naslov.
Wait for Network
Če uporabljate sistemske NFS/SMB mounte ali skupno Kodi/MySQL bazo, je lahko koristna možnost:
My OSMC → Network → Wait for Network
S tem OSMC pred zagonom Kodija počaka, da je omrežna povezava dejansko vzpostavljena.
4. Kako ugotoviti IP naslov Vero V
IP naslov potrebujemo za SSH, SFTP, Samba, diagnostiko in številne druge funkcije.
Najdemo ga pod:
Settings → System Information → Network
Primer:
192.168.1.505. SSH dostop do Vero V
Za večino naprednih nastavitev potrebujemo dostop do Linux ukazne vrstice.
Na Windows 10/11 lahko uporabimo Windows Terminal ali PowerShell:
ssh osmc@192.168.1.50IP seveda zamenjamo z naslovom naše naprave.
Privzeta podatka OSMC sta:
uporabnik: osmc
geslo:     osmc
Takoj spremenimo geslo
passwdSistem zahteva trenutno in nato novo geslo.
Pomembno: SSH z geslom osmc nikoli
ne izpostavljajte neposredno internetu. Za oddaljeni dostop je
bistveno primernejši VPN.
Če se po ponovni namestitvi pojavi SSH napaka
Po ponovni namestitvi Vero V dobi nov SSH ključ. Računalnik lahko zato prikaže:
REMOTE HOST IDENTIFICATION HAS CHANGEDStari zapis odstranimo z:
ssh-keygen -R 192.168.1.50in se nato ponovno povežemo.
6. Priklop zunanjega USB diska
Vero V ima USB 3.0 priključek, ki je posebej primeren za zunanje HDD in SSD diske.
OSMC odstranljive naprave praviloma samodejno priklopi pod:
/media/IME_DISKAČe je disk označen kot FILMI, bo njegova pot običajno:
/media/FILMIPregled priklopljenih diskov
lsblk -fali:
df -hali:
ls -lah /mediaUUID particije
Za natančne podatke o particijah lahko uporabimo:
blkidPrimer:
/dev/sda1: LABEL="FILMI" UUID="12ab34cd-..." TYPE="ext4"Varno odklapljanje
Diska med pisanjem podatkov ne izklapljamo. Preden ga fizično odklopimo, ga lahko prek SSH odmontiramo:
sudo umount /media/FILMIČe dobimo sporočilo, da je naprava zasedena, jo trenutno uporablja Kodi ali drug proces.
7. EXT4, exFAT ali NTFS?
Izbira datotečnega sistema je pomembna predvsem pri disku, ki bo na Vero V priklopljen stalno.
| Datotečni sistem | Prednost | Slabost | Priporočilo |
|---|---|---|---|
| EXT4 | Odlična Linux zmogljivost in stabilnost | Windows ga brez dodatne programske opreme ne bere | Najboljša izbira za stalni disk na Vero V |
| exFAT | Dobra združljivost z Windows in macOS | Manj Linux funkcij kot EXT4 | Odličen prenosni disk |
| NTFS | Odlična Windows združljivost | Na Linux napravah je lahko počasnejši pri pisanju | Uporabimo, če disk pogosto priklapljamo na Windows |
Pri uporabniških meritvah na Vero V so bile objavljene hitrosti pisanja približno okoli 35 MB/s pri NTFS ter blizu 100 MB/s pri EXT4 v ugodnih pogojih. To niso garantirane številke in so odvisne od diska, USB ohišja, datotečnega sistema in omrežja, vendar dobro pokažejo prednost Linuxovega datotečnega sistema, kadar Windows združljivost ni potrebna.
8. Stalni mount USB diska prek UUID in fstab
Za običajno uporabo je samodejni mount v /media povsem dovolj.
Če pa disk postane stalni del medijske infrastrukture ali ga bomo delili prek NFS, je smiselno določiti nespremenljivo lokacijo, na primer:
/mnt/filmi1. Preverimo UUID
lsblk -fali:
blkid2. Ustvarimo mount točko
sudo mkdir -p /mnt/filmi3. Pred spremembo naredimo backup fstab
sudo cp /etc/fstab /etc/fstab.backup4. Uredimo fstab
sudo nano /etc/fstabZa EXT4 lahko dodamo:
UUID=VAŠ-UUID /mnt/filmi ext4 defaults,noatime,nofail,x-systemd.mount-timeout=30 0 0
VAŠ-UUID nadomestimo z dejanskim UUID.
5. Vedno preverimo konfiguracijo pred rebootom
sudo mount -aČe se vrne samo nov ukazni poziv brez napake, preverimo:
ls -lah /mnt/filmi
Pomembno: napačen zapis v /etc/fstab
lahko povzroči težave ob zagonu. Zato vedno najprej naredimo
backup datoteke in uporabimo sudo mount -a.
9. Vero V kot omrežni disk – Samba Server
Vero V lahko deluje tudi v obratni smeri: disk priključimo na Vero V, do njega pa dostopamo z drugih računalnikov.
Odprite:
My OSMC → App Store → Samba Server
in namestite Samba Server.
OSMC Samba strežnik nato samodejno deli domačo mapo in samodejno priklopljene odstranljive medije.
Dostop iz Windows
V File Explorer vpišemo:
\\192.168.1.50Pojavijo se deljene mape oziroma USB diski.
Mapo lahko v Windows nato tudi mapiramo kot običajen omrežni pogon z lastno črko.
SMB1?
SMB1 je star in varnostno problematičen protokol. Pri sodobnih Windows, Synology, QNAP in TrueNAS sistemih ga ne priporočamo.
Uporabljajte SMB2 oziroma SMB3.
10. Prenos datotek prek SFTP / WinSCP
Če ne želimo nameščati Samba Serverja, lahko datoteke prenašamo tudi prek SSH oziroma SFTP.
Na Windows je zelo praktičen WinSCP.
Nastavitve:
Protocol: SFTP
Host:     192.168.1.50
Port:     22
Username: osmc
Password: vaše OSMC geslo
USB diski bodo praviloma pod:
/mediastalni mounti pa pod:
/mntSFTP je zelo praktičen za manjša administrativna opravila, prenos podnapisov, konfiguracijskih datotek in backupov.
Pri zelo velikih filmih je SMB pogosto hitrejši, saj SFTP dodatno obremenjuje procesor zaradi šifriranja.
11. Dodajanje filmov in serij v Kodi
Največja prednost Kodija ni samo predvajanje datotek, ampak prava medijska knjižnica.
Priporočena struktura filmov
Movies/
├── Dune (2021)/
│   └── Dune (2021).mkv
├── Oppenheimer (2023)/
│   └── Oppenheimer (2023).mkv
└── The Matrix (1999)/
    └── The Matrix (1999).mkv
Priporočena struktura serij
TV Shows/
└── Breaking Bad/
    ├── Season 01/
    │   ├── Breaking Bad S01E01.mkv
    │   └── Breaking Bad S01E02.mkv
    └── Season 02/
Dodajanje vira
Videos → Files → Add videos → Browse
Nato izberemo disk ali mount točko.
Za lokalni USB:
/media/FILMIali:
/mnt/filmiNato nastavimo vrsto vsebine:
- Movies za filme,
- TV Shows za serije,
- Music Videos za glasbene videe.
Priporočilo: filmov in serij ne mešamo v isti Kodi source. Ločeni viri omogočajo bistveno zanesljivejše prepoznavanje vsebine.
12. NAS prek SMB neposredno v Kodi
To je najpreprostejši način dostopa do Windows, Synology, QNAP ali drugih SMB deljenih map.
V Kodi odpremo:
Videos → Files → Add videos → Browse → Add network location
Protokol:
Windows network (SMB)Primer nastavitev:
Server name: 192.168.1.20
Shared folder: Movies
Username: vero
Password: ********
Če imamo več deljenih map na istem NAS-u, lahko vnesemo samo strežnik in se nato po njem premikamo.
Uporabite namenski račun
Na NAS-u priporočamo račun, na primer:
veroČe Vero V samo predvaja vsebine, mu lahko dodelimo samo pravice za branje.
To je varneje od uporabe glavnega administratorskega računa NAS-a.
Če se NAS v omrežnem brskalniku ne prikaže
To še ne pomeni, da SMB ne deluje.
Sodobni SMB2/SMB3 sistemi pogosto ne podpirajo starega načina omrežnega odkrivanja.
Uporabite Add network location ter neposredno vnesite IP naslov.
13. SMB prek sistemskega mounta in fstab
Pri večjih UHD knjižnicah lahko omrežni vir priklopimo neposredno v Linux datotečni sistem.
Kodi ga nato vidi kot lokalno mapo.
Primer
NAS:
192.168.1.20Share:
MoviesMount na Vero:
/mnt/NAS_Movies1. Ustvarimo mount point
sudo mkdir -p /mnt/NAS_Movies2. Ustvarimo varno datoteko z geslom
nano ~/.smbcredentialsVpišemo:
username=vero
password=MOJE_GESLO
Shranimo in zaščitimo:
chmod 600 ~/.smbcredentials3. Backup fstab
sudo cp /etc/fstab /etc/fstab.backup4. Uredimo fstab
sudo nano /etc/fstabDodamo:
//192.168.1.20/Movies /mnt/NAS_Movies cifs x-systemd.automount,noauto,rw,iocharset=utf8,credentials=/home/osmc/.smbcredentials,uid=osmc,gid=osmc,file_mode=0770,dir_mode=0770,vers=3.0 0 0
Če strežnik uporablja drug SMB dialekt, je lahko potrebna druga
vrednost vers=. Pri nekaterih sodobnih sistemih je
lahko primeren tudi SMB 3.1.1.
5. Preverimo napake
sudo mount -aNato:
sudo systemctl daemon-reload
sudo systemctl restart remote-fs.target
6. Test
ls -lah /mnt/NAS_MoviesČe vidimo filme, mount deluje.
7. Dodamo v Kodi
Ne izberemo SMB network location.
Izberemo:
Browse → Root filesystem → mnt → NAS_Movies
Read-only mount
Če Vero V ne potrebuje pravice pisanja, lahko rw zamenjamo z:
roTo je dobra dodatna zaščita medijske knjižnice.
Test SMB strežnika s smbclient
sudo apt-get install smbclientNato:
smbclient -L 192.168.1.20 -U veroČe se prikaže seznam share-ov, omrežna povezava in prijava delujeta.
14. NAS prek NFS neposredno v Kodi
NFS je naravni Linux omrežni datotečni protokol in je zelo primeren za OSMC.
V Kodi izberemo:
Videos → Files → Add videos → Browse → Network File System (NFS)
Če NAS objavlja NFS export, bi ga Kodi moral prikazati.
Če avtomatsko odkrivanje ne deluje, lahko uporabimo sistemski mount, ki je pogosto tudi hitrejša in robustnejša rešitev.
15. NFS prek fstab
OSMC skupnost že dolgo priporoča kernel NFS mount pri zahtevnejših medijskih knjižnicah.
1. Preverimo, kaj NAS izvaža
showmount -e 192.168.1.20Če ukaz ni na voljo:
sudo apt-get install nfs-commonPrimer rezultata:
Export list for 192.168.1.20:
/volume1/Movies 192.168.1.0/24
2. Ustvarimo mount point
sudo mkdir -p /mnt/NAS_Movies3. Backup fstab
sudo cp /etc/fstab /etc/fstab.backup4. Dodamo mount
sudo nano /etc/fstabPrimer:
192.168.1.20:/volume1/Movies /mnt/NAS_Movies nfs noauto,x-systemd.automount 0 05. Test
sudo mount -a
sudo systemctl daemon-reload
sudo systemctl restart remote-fs.target
Nato:
ls -lah /mnt/NAS_MoviesNFSv4
Pri NFSv4-only strežniku je lahko potrebno eksplicitno določiti verzijo.
Za ročni test:
sudo mount -t nfs -o vers=4 192.168.1.20:/Movies /mnt/NAS_MoviesNa OSMC forumu so dokumentirani primeri, ko Kodijev NFS brskalnik NFSv4-only strežnika ni našel, sistemski mount pa je deloval normalno.
16. Autofs – priporočena rešitev za NAS, ki ni vedno dosegljiv
Če je NAS vedno vključen, je fstab praviloma povsem ustrezen.
Če pa se NAS:
- ugaša,
- uspava,
- ponovno zaganja ali
- je občasno nedosegljiv,
je autofs zelo dobra rešitev.
Autofs share priklopi šele takrat, ko nekdo dejansko dostopa do mape. Po obdobju neaktivnosti ga lahko spet odklopi.
S tem se zmanjša možnost, da bi nedosegljiv NAS blokiral OSMC ali Kodi.
Namestitev autofs
sudo apt-get install autofsSMB z autofs
Uredimo:
sudo nano /etc/auto.masterDodamo:
/- /etc/auto.smb.shares --timeout 15 browseNato:
sudo nano /etc/auto.smb.sharesPrimer:
/mnt/NAS/Movies -fstype=cifs,rw,credentials=/home/osmc/.smbcredentials,iocharset=utf8,uid=osmc,gid=osmc,vers=3.0 ://192.168.1.20/Movies
Pri autofs mount točka ne sme imeti zaključnega znaka /.
Pravilno je /mnt/NAS/Movies, ne
/mnt/NAS/Movies/.
NFS z autofs
V /etc/auto.master dodamo:
/- /etc/auto.nfs.shares --timeout 15 browseNato:
sudo nano /etc/auto.nfs.sharesPrimer:
/mnt/NAS/Movies 192.168.1.20:/volume1/MoviesPonovni zagon autofs
sudo systemctl restart autofsTest
ls -lah /mnt/NAS/MoviesŽe sam dostop do mape sproži mount.
Diagnostika autofs
Če ne deluje:
sudo systemctl stop autofs
sudo automount -f -v -d
Nato v drugem SSH oknu poskusimo:
ls -lah /mnt/NAS/MoviesV prvem oknu bomo videli, kaj se dogaja med poskusom mounta.
17. SMB ali NFS?
| SMB | NFS | |
|---|---|---|
| Windows okolje | Odlično | Manj praktično |
| Linux / OSMC | Zelo dobro | Odlično |
| Uporabnik + geslo | Da | Običajno dostop določen z IP/UID pravili |
| Preprosta domača konfiguracija | Zelo enostavna | Nekoliko bolj tehnična |
| Zmogljivost | Zelo dobra | Praviloma odlična |
Naše praktično priporočilo
Če NAS uporabljajo tudi Windows računalniki in želite preprosto upravljanje uporabnikov:
SMB3.
Če gradite predvsem Linux/OSMC medijsko infrastrukturo in NAS ponuja dobro NFS implementacijo:
NFS.
Za zelo zahtevne 4K knjižnice je pomembneje od samega protokola, da uporabljamo kernel mount in stabilno omrežje.
18. Synology, QNAP in TrueNAS – priporočena logika
Natančna imena menijev se med različnimi verzijami NAS sistemov spreminjajo, osnovna logika pa je enaka.
Synology
- ustvarimo mapo Movies,
- ustvarimo uporabnika vero,
- dodelimo Read ali Read/Write pravice,
- vključimo SMB2/SMB3 oziroma NFS,
- SMB1 pustimo izključen.
QNAP
- ustvarimo Shared Folder,
- ustvarimo namenski uporabniški račun,
- omogočimo SMB3 ali NFS,
- omejimo pravice samo na potrebne mape.
TrueNAS
- ustvarimo dataset za medije,
- ustvarimo SMB ali NFS share,
- pravilno nastavimo ACL oziroma UNIX dovoljenja,
- Vero dodamo kot odjemalca.
Za predvajalnik skoraj nikoli ni potrebno uporabljati NAS administratorskega računa. Uporabite namenski račun z najmanjšimi potrebnimi pravicami.
19. Merjenje hitrosti omrežja z iperf3
Če se 4K video zatika, ne ugibamo. Najprej izmerimo omrežje.
Namestitev na Vero
sudo apt-get install iperf3Na NAS oziroma računalniku
Zaženemo iperf3 server:
iperf3 -sNAS → Vero
To je za predvajanje najpomembnejša smer:
iperf3 -R -c 192.168.1.20Vero → NAS
iperf3 -c 192.168.1.20Kaj pričakovati?
Na zdravi Gigabit Ethernet povezavi se lahko rezultat približa 900–940 Mbit/s.
Če dobite na primer:
94 Mbit/sje zelo verjetno nekje v povezavi vzpostavljena samo 100-Mbit povezava.
Preverimo:
- UTP kabel,
- switch port,
- NAS mrežno kartico,
- router,
- morebitni 100-Mbit vmesni switch.
Če je rezultat Wi-Fi nestabilen, test ponovimo večkrat. Pri brezžični povezavi je pomembna tudi variacija hitrosti, ne samo najboljši izmerjeni rezultat.
20. Priporočene Kodi video nastavitve
Za 4K televizor priporočamo, da Kodi uporabniški vmesnik ni po nepotrebnem ves čas nastavljen na 4K.
Priporočena osnovna konfiguracija
Settings → System → Display
Resolution: 1920 × 1080p
Whitelist: prazna, če nimamo posebnega razloga za ročno nastavitev
Nato:
Settings → Player → Videos
Adjust display refresh rate: On start/stop
Sync playback to display: OFF
Ko se začne 4K film, lahko Kodi sam preklopi izhod v 4K in ustrezno frekvenco.
Zakaj 1080p uporabniški vmesnik?
Kodi vmesnik nima koristi od tega, da ves čas deluje v 4K, hkrati pa s tem napravi naložimo več dela.
Vsebina sama zaradi 1080p GUI-ja ni omejena na 1080p. 4K film se še vedno predvaja v 4K.
23,976 / 24p
Filmi so pogosto kodirani pri 23,976 oziroma 24 fps. Vero V lahko televizor samodejno preklopi na ustrezno osveževanje.
Ko televizor preklopi način, lahko za sekundo ali dve vidimo črn zaslon. To je normalna HDMI ponovna sinhronizacija.
21. Dolby Vision in HDR
Vero V podpira HDR10, HDR10+, HLG in Dolby Vision.
OSMC pri podprtih Dolby Vision vsebinah uporablja TV-led oziroma display-led Dolby Vision.
To pomeni, da končno prilagajanje Dolby Vision slike naredi televizor.
Dolby Vision Profile 7 FEL
Od leta 2026 standardna OSMC izdaja za Vero V podpira tudi Dolby Vision Full Enhancement Layer.
Kaj potrebujemo?
- Vero V z aktualnim OSMC,
- Dolby Vision kompatibilen televizor,
- HDMI pot, ki podpira ustrezne video načine,
- če uporabljamo AVR, mora tudi AVR pravilno prepuščati signal.
Standard Mode in Low Latency Dolby Vision
Za najboljšo Dolby Vision podporo OSMC zahteva zaslon, ki podpira običajni oziroma Standard Mode Dolby Vision.
Nekateri zgodnji televizorji podpirajo samo Low Latency Dolby Vision, kar je lahko omejitev.
Če Dolby Vision prikaže napačne barve ali črn zaslon
- preverimo, da je OSMC posodobljen,
- preizkusimo neposredno povezavo Vero → TV,
- preverimo drugi HDMI vhod,
- preverimo HDMI Enhanced / Deep Colour nastavitev televizorja,
- preizkusimo drug kakovosten HDMI kabel,
- preverimo, ali težavo povzroča samo določen DV profil ali datoteka,
- zberemo OSMC debug log.
22. Dolby Atmos, DTS:X in HD-avdio passthrough
Za napredne avdio nastavitve najprej preklopimo Kodi Settings Level na:
Expert
Nato odpremo:
Settings → System → Audio
Če uporabljamo HDMI in zmogljiv AVR
Tipična konfiguracija:
Audio device: HDMI / PCM
Number of channels: 7.1
Output configuration: Best match
Allow passthrough: ON
Nato glede na AVR omogočimo:
- Dolby Digital / AC3,
- Dolby Digital Plus / E-AC3,
- DTS,
- DTS-HD,
- Dolby TrueHD.
Atmos v TrueHD toku bo ob pravilnem passthroughu prejel AVR. Enako velja za DTS:X znotraj DTS-HD toka.
Pomembno:
Sync playback to display mora biti pri passthroughu
izključen.
SPDIF
Optični SPDIF ne zmore HD formatov, kot sta Dolby TrueHD in DTS-HD MA.
Pri SPDIF običajno nastavimo:
Channels: 2.0
AC3/DTS passthrough: ON
TrueHD: OFF
DTS-HD: OFF
E-AC3: OFF
Analogni izhod
Pri analognem izhodu:
Channels: 2.0
Passthrough: OFF
23. Vero → AVR → TV ali Vero → TV → AVR?
Priporočena povezava za resen domači kino
Vero V → HDMI → AVR → HDMI → TVTako AV-sprejemnik neposredno prejme Dolby TrueHD, Atmos, DTS-HD in DTS:X.
Druga možnost
Vero V → TV → eARC → AVRTa postavitev je lahko odlična, če TV podpira pravilno passthrough posredovanje HD zvoka prek eARC.
Starejši ARC
Običajni ARC ima bistveno več omejitev kot eARC in praviloma ne prenaša lossless Dolby TrueHD/DTS-HD MA na enak način.
Če Atmos ne deluje prek TV-ja, Vero začasno priklopimo neposredno na AVR. S tem hitro ugotovimo, ali omejitev povzroča TV.
24. HDMI-CEC
Vero V podpira HDMI-CEC, zato lahko v številnih sistemih uporabljamo tudi daljinski upravljalnik televizorja.
Nastavitve najdemo pod:
Settings → System → Input → Peripherals → CEC Adapter
Odvisno od opreme lahko CEC omogoči:
- upravljanje Vero V z daljincem televizorja,
- samodejni preklop HDMI vhoda,
- vklop televizorja,
- standby televizorja oziroma AVR-ja.
Če prihaja do nenavadnega vklapljanja ali izklapljanja naprav, CEC možnosti omejimo in omogočimo samo funkcije, ki jih dejansko želimo.
25. OSMC daljinec in uporabne bližnjice
OSMC RF daljinski upravljalnik podpira tudi funkcije dolgega pritiska.
Med predvajanjem videa
- dolgi Left: nastavitev zamika zvoka,
- dolgi Right: nastavitev zamika podnapisov,
- dolgi Play: vklop/izklop podnapisov,
- dolgi Stop: nastavitve podnapisov,
- dolgi Menu: avdio nastavitve,
- dolgi Back: ustavitev predvajanja.
Na domačem zaslonu
Odvisno od CEC konfiguracije lahko Home oziroma dolgi Home pošlje CEC activate source oziroma standby ukaz.
Ponovno parjenje daljinca
Pridržimo:
Home + OKUSB 3.0 in RF motnje
USB 3.0 naprave lahko v določenih pogojih povzročajo RF motnje v območju 2,4 GHz in s tem zmanjšajo doseg OSMC daljinca.
Če opazimo težavo:
- ponovno sparimo daljinec,
- USB disk odmaknemo od Vero V,
- uporabimo kakovosten USB kabel oziroma podaljšek,
- Vero V ne skrivamo neposredno za drugimi napravami.
26. Podnapisi
Kodi podpira vgrajene in zunanje podnapise.
Zunanji SRT
Najbolj zanesljivo je, da ima datoteka enako ime kot film:
Dune (2021).mkv
Dune (2021).sl.srt
Dune (2021).en.srt
Zamik podnapisov
Med predvajanjem uporabimo dolgi pritisk na desno tipko OSMC daljinca in prilagodimo čas.
Jezikovne nastavitve
V Kodi lahko določimo prednostni jezik zvoka in podnapisov, kar je zelo praktično pri večjezičnih MKV datotekah.
27. Bluetooth naprave
Vero V ima Bluetooth 4.0.
Upravljanje je v:
My OSMC → Network → Bluetooth
Postopek:
- omogočimo Bluetooth,
- vključimo discovery,
- napravo damo v pairing mode,
- izberemo napravo v seznamu,
- potrdimo povezavo oziroma PIN.
Na ta način lahko povežemo določene tipkovnice, miške, kontrolerje in druge podprte naprave.
28. Varnostna kopija OSMC
Ko imamo Vero V popolnoma nastavljen, naredimo backup.
Odprite:
My OSMC → Backup
OSMC omogoča varnostno kopiranje uporabniških nastavitev in urnik backupov.
Kam shraniti backup?
Ne priporočamo, da je edina kopija na notranjem pomnilniku Vero V.
Primerne lokacije:
- NAS,
- USB disk,
- drug računalnik.
Pred večjo posodobitvijo
Naredimo svežo varnostno kopijo.
My OSMC backup je backup nastavitev in uporabniških podatkov, ne pa nujno bit-for-bit slika celotnega notranjega eMMC diska.
29. Ponovna namestitev OSMC
Če sistem zaradi eksperimentiranja ali poškodovane konfiguracije ni več stabilen, lahko OSMC ponovno namestimo.
Potrebujemo
- USB ključ ali microSD kartico,
- računalnik,
- OSMC installer,
- backup nastavitev.
Postopek
- na računalniku pripravimo namestitveni medij za Vero V,
- Vero V ugasnemo,
- vstavimo USB oziroma microSD,
- vključimo Vero V,
- namestitev se prikaže na zaslonu,
- po koncu sledimo začetnemu čarovniku.
Pozor: ponovna namestitev formatira in ponovno particionira notranji pomnilnik Vero V. Pred začetkom naredite backup.
Po sveži namestitvi sistem najprej posodobimo in šele nato obnovimo backup, še posebej če je namestitvena slika starejša od trenutno nameščene izdaje.
30. Logi in diagnostika – najpomembnejše orodje pri težavah
Če Vero V ne predvaja določene datoteke ali se pojavi težava, naključno spreminjanje nastavitev pogosto samo zakrije pravi vzrok.
Vključimo debug logging
Settings → System → Logging → Enable debug logging
Nato težavo ponovno reproduciramo.
My OSMC Log Uploader
Loge lahko naložimo prek My OSMC in dobimo povezavo, ki jo dodamo objavi na OSMC forumu.
Če Kodi ne deluje
Prek SSH:
grab-logs -AOSMC ustvari URL z diagnostičnimi podatki.
Pri težavah samo z določeno video datoteko
Poleg loga je koristno dodati tudi izpis programa MediaInfo. Tako je razvidno:
- kodek,
- profil,
- bitna globina,
- HDR/Dolby Vision profil,
- avdio kodek,
- bitna hitrost in
- container.
31. Najpogostejše težave in rešitve
NAS se v Kodi ne prikaže
Ne uporabljajte avtomatskega SMB network browsinga kot edinega testa.
Poskusite:
Add network location → SMB → IP NAS-aČe imate SSH dostop:
smbclient -L 192.168.1.20 -U veroSMB javi Permission denied
Preverimo:
- uporabniško ime,
- geslo,
- pravice uporabnika na NAS-u,
- ACL mape,
- SMB verzijo.
SMB mount ne deluje po rebootu
Preverimo:
sudo mount -a
journalctl -b | grep -i cifs
Če NAS ob zagonu še ni dosegljiv, uporabimo
x-systemd.automount, Wait for Network
ali še bolje autofs.
NFS se ne prikaže v Kodi brskalniku
Pri NFSv4-only konfiguracijah avtomatsko odkrivanje ni vedno zanesljivo.
Preverimo exporte:
showmount -e 192.168.1.20in nato naredimo kernel mount.
4K film se zatika
Najprej naredimo:
iperf3 -R -c 192.168.1.20Če dobimo samo približno 90–95 Mbit/s na žični povezavi, je skoraj gotovo nekje vzpostavljen Fast Ethernet namesto Gigabit Ethernet.
Preverimo še:
- SMB/NFS mount način,
- NAS zmogljivost,
- kabel,
- switch,
- bitrate problematičnega videa.
Dolby Atmos se ne prikaže na AVR
Preverimo:
- Kodi Settings Level = Expert,
- Allow passthrough = ON,
- TrueHD capable receiver = ON,
- DTS-HD capable receiver = ON, če je podprto,
- Sync playback to display = OFF,
- Vero začasno priklopimo neposredno na AVR.
Zvok dela, Atmos pa ne
Preverimo, ali je zvočna steza dejansko Dolby TrueHD + Atmos. Atmos je lahko tudi v Dolby Digital Plus, zato je pomembno, kateri format datoteka dejansko vsebuje.
Črn zaslon ob začetku filma
Kratek črn zaslon ob začetku oziroma koncu predvajanja je lahko popolnoma normalen.
Televizor preklaplja:
- ločljivost,
- refresh rate,
- HDR način,
- Dolby Vision način.
Če črn zaslon ostane, preverimo HDMI kabel in AV-sprejemnik.
Dolby Vision ima zelene/vijolične barve
To praviloma kaže na nepravilno DV obdelavo oziroma nezdružljivost specifičnega profila, datoteke ali HDMI poti.
Preverimo isto datoteko pri neposrednem Vero → TV priklopu in zberemo debug log.
USB disk se ne prikaže
Prek SSH:
lsblk -f
blkid
dmesg | tail -50
Če ga vidi lsblk, ne pa Kodi, je težava drugačna kot
če ga sistem sploh ne zazna.
USB disk dobi drugo ime mape
Pri removable automountu OSMC uporablja label diska.
Pri stalni knjižnici je zato bolje uporabiti UUID mount v
/mnt.
Daljinec nenadoma slabše deluje
Če je bila ravno priklopljena USB 3.0 naprava, jo fizično odmaknemo in ponovno sparimo daljinec z Home + OK.
SSH ne sprejme povezave po ponovni namestitvi
ssh-keygen -R 192.168.1.50Nato ponovno vzpostavimo povezavo.
Vero V predvaja 4K, vmesnik pa kaže 1080p
To je lahko pravilno in celo priporočeno.
Kodi GUI je lahko 1080p, med začetkom 4K filma pa se izhod samodejno preklopi na 2160p.
NAS se občasno ugaša in Kodi zmrzne pri dostopu
Za takšen scenarij namesto klasičnega permanentnega mounta uporabimo autofs.
32. Pogosta vprašanja
Ali je za Vero V boljši SMB ali NFS?
Oba sta dobra. V Windows mešanem okolju je SMB3 običajno preprostejši, v Linux/NAS okolju pa je NFS zelo učinkovita rešitev.
Ali moram uporabljati fstab?
Ne. Za običajnega uporabnika je Kodi SMB/NFS dostop povsem dovolj. Sistemski mount je zanimiv predvsem za zahtevnejše knjižnice, visoke bitrate in napredne konfiguracije.
Kdaj naj uporabim autofs?
Ko NAS ali računalnik ni ves čas vključen oziroma se uspava.
Ali lahko na Vero V priključim USB HDD?
Da. Vero V ima USB 3.0 in OSMC disk praviloma samodejno priklopi
v direktorij /media.
Kateri datotečni sistem priporočate?
Za disk, ki bo stalno na Vero V, EXT4. Za disk, ki ga pogosto priklapljamo tudi na Windows oziroma macOS, exFAT.
Ali lahko disk, priklopljen na Vero V, vidim na Windows računalniku?
Da. V My OSMC App Store namestimo Samba Server in do Vero dostopamo
prek \\IP-NASLOV-VERO.
Ali potrebujem statični IP?
Ni nujno. Priporočamo DHCP reservation na routerju.
Ali Vero V podpira Gigabit Ethernet?
Da.
Kako preverim, ali Gigabit Ethernet res deluje?
Z iperf3. Zdrava gigabitna povezava se lahko približa
približno 900–940 Mbit/s.
Ali mora biti Kodi GUI nastavljen na 4K?
Ne. Za tipično postavitev priporočamo 1080p GUI in Adjust display refresh rate na On start/stop. 4K video se še vedno predvaja v 4K.
Ali Vero V podpira Dolby Atmos?
Da, vključno z bit-perfect passthroughom Dolby TrueHD/Atmos na združljiv AV-sprejemnik.
Ali podpira DTS:X?
Da, prek DTS-HD passthrougha na združljiv AVR.
Ali podpira Dolby Vision?
Da. Vero V podpira TV-led Dolby Vision in aktualni OSMC tudi Dolby Vision FEL.
Zakaj mora biti Sync playback to display izključen?
Ker ni združljiv z normalnim bitstream avdio passthrough načinom.
Kje so Kodi podatki?
OSMC uporabniški Kodi direktorij je:
/home/osmc/.kodi/.
Kje je advancedsettings.xml?
Uporabniška datoteka je:
/home/osmc/.kodi/userdata/advancedsettings.xml.
Ali lahko Vero V uporabljam brez Linux znanja?
Da. Večina uporabnikov SSH in ukazne vrstice sploh ne potrebuje.
Naša priporočena Vero V konfiguracija
Za zahtevnejšo domačo medijsko postavitev bi na varnaPot.si izhajali iz naslednje arhitekture:
NAS
 │
 │ SMB3 ali NFS
 │
Gigabit / 2.5 GbE omrežno stikalo
 │
 │ 1 GbE
 │
OSMC Vero V
 │
 │ HDMI
 │
AV-sprejemnik
 │
 │ HDMI
 │
4K HDR / Dolby Vision televizor- NAS in Vero V imata DHCP reservation.
- Vero uporablja žični Gigabit Ethernet.
- NAS ima ločen uporabniški račun za Vero.
- Pri vedno dostopnem NAS-u uporabimo kernel NFS/SMB mount.
- Pri NAS-u, ki se ugaša, uporabimo autofs.
- Kodi GUI nastavimo na 1080p.
- Adjust display refresh rate nastavimo na On start/stop.
- Sync playback to display pustimo izključen.
- HD-avdio posredujemo neposredno AVR-ju.
- Po končani konfiguraciji naredimo backup.
Zaključek
OSMC Vero V je lahko zelo preprost predvajalnik, hkrati pa je dovolj odprt, da postane osrednja predvajalna točka zelo naprednega domačega kino sistema.
Začetniku zadostuje USB disk ali SMB mapa, dodana neposredno v Kodi.
Naprednejši uporabnik lahko uporablja NFS, SMB kernel mounte,
fstab, autofs, SSH, SFTP,
Samba Server, avtomatizacijo in druge Linux funkcije.
Prav ta kombinacija preproste vsakodnevne uporabe in odprtega Linux sistema je ena največjih prednosti Vero V.
Ko so omrežje, NAS, video izhod in avdio passthrough enkrat pravilno nastavljeni, je vsakodnevna uporaba sistema zelo preprosta: izberemo film in pritisnemo Play.
OSMC Vero V na varnaPot.si
Če Vero V šele izbirate, si lahko preberete tudi naš podrobni predstavitveni članek ali napravo pogledate v spletni trgovini.
From the first boot to an advanced home cinema installation: this guide brings together practical instructions for OSMC Vero V, network drives, NAS servers, external USB drives, Kodi, Dolby Atmos, Dolby Vision, HDMI-CEC, backups and troubleshooting.
Vero V can be used very simply: connect it to the television, add a media folder and start playing. Its real advantage, however, is that a complete Linux system runs underneath OSMC’s simple user interface. This means the same device can be used to build a considerably more advanced solution with a NAS server, SMB or NFS network sources, automatic mounts, an AV receiver, HD-audio passthrough and a centralised Kodi library.
This article is intended for both groups of users: beginners who want to configure Vero V correctly, and advanced users who want to get as much as possible from the device.
If you are only just getting to know Vero V, we recommend first reading our overview article as well:
→ OSMC Vero V – 4K HDR, Dolby Vision and Dolby Atmos media player
1. What we recommend before you start
Before the first serious Vero V configuration, it is worth making a few decisions that will make everyday use and troubleshooting much easier later on.
Our recommended basic setup
Internet
   │
Router
   │
Gigabit network switch
   ├──────── NAS / server
   │
   └──────── OSMC Vero V
                  │
                 HDMI
                  │
            AV receiver
                  │
                 HDMI
                  │
       4K HDR / Dolby Vision TV
If you do not use an AV receiver:
NAS → network → Vero V → HDMI → TVBefore configuration we recommend
- updating Vero V to the current version of OSMC,
- using Gigabit Ethernet whenever possible,
- assigning a fixed or reserved IP address to the NAS and Vero V,
- changing the default SSH password,
- keeping movies and TV series in separate folders,
- using a separate NAS user account for Vero V, and
- creating a backup after configuration is complete.
2. First boot and OSMC update
After connecting the HDMI cable, network and power, the OSMC first-run wizard appears on the first boot.
Select the language, time zone, network and other basic options.
After the initial setup is complete, one of the first things we recommend is:
My OSMC → Updates
and manually checking for updates.
OSMC regularly releases updates that, in addition to security fixes, bring improvements to Kodi, the kernel, video support, networking, Dolby Vision and other parts of the system.
Tip: before a major system update, it is sensible to create a backup through My OSMC.
3. Network: Ethernet, Wi-Fi and a fixed IP
Vero V has Gigabit Ethernet and 802.11ac Wi-Fi.
For normal use, Wi-Fi can be completely sufficient. If, however, you play large UHD Blu-ray remuxes or use a NAS, we recommend a wired connection.
Why Gigabit Ethernet?
With video, the average bitrate of the file is not the only important factor. Short-term data peaks can be considerably higher.
A stable Gigabit connection therefore provides significantly more headroom than a 100-Mbit connection or a weaker Wi-Fi signal.
A DHCP reservation is generally better than a manually configured static IP
You can configure the IP address manually on Vero V, but in a home network we generally recommend creating a DHCP reservation on the router instead.
Example:
NAS    → 192.168.1.20
Vero V → 192.168.1.50
The router then manages the IP address, while the device always receives the same address.
Wait for Network
If you use system-level NFS/SMB mounts or a shared Kodi/MySQL database, the following option can be useful:
My OSMC → Network → Wait for Network
This makes OSMC wait for the network connection to be properly established before Kodi starts.
4. How to find the Vero V IP address
The IP address is needed for SSH, SFTP, Samba, diagnostics and many other functions.
You can find it under:
Settings → System Information → Network
Example:
192.168.1.505. SSH access to Vero V
For most advanced settings, we need access to the Linux command line.
On Windows 10/11 you can use Windows Terminal or PowerShell:
ssh osmc@192.168.1.50Of course, replace the IP address with the address of your own device.
The default OSMC credentials are:
username: osmc
password: osmc
Change the password immediately
passwdThe system asks for the current password and then the new password.
Important: never expose SSH with the password osmc
directly to the Internet. For remote access, a VPN is
a much better choice.
If an SSH error appears after reinstalling
After reinstalling, Vero V receives a new SSH key. The computer may therefore display:
REMOTE HOST IDENTIFICATION HAS CHANGEDRemove the old entry with:
ssh-keygen -R 192.168.1.50and then connect again.
6. Connecting an external USB drive
Vero V has a USB 3.0 port that is particularly suitable for external HDD and SSD drives.
OSMC normally mounts removable devices automatically under:
/media/DRIVE_NAMEIf the drive is labelled MOVIES, its path will normally be:
/media/MOVIESViewing connected drives
lsblk -for:
df -hor:
ls -lah /mediaPartition UUID
For detailed partition information, you can use:
blkidExample:
/dev/sda1: LABEL="MOVIES" UUID="12ab34cd-..." TYPE="ext4"Safe removal
Do not disconnect the drive while data is being written. Before physically disconnecting it, you can unmount it through SSH:
sudo umount /media/MOVIESIf you receive a message that the device is busy, Kodi or another process is currently using it.
7. EXT4, exFAT or NTFS?
The choice of filesystem is particularly important for a drive that will be permanently connected to Vero V.
| Filesystem | Advantage | Disadvantage | Recommendation |
|---|---|---|---|
| EXT4 | Excellent Linux performance and stability | Windows cannot read it without additional software | Best choice for a permanent Vero V drive |
| exFAT | Good compatibility with Windows and macOS | Fewer Linux features than EXT4 | Excellent portable-drive choice |
| NTFS | Excellent Windows compatibility | Writing can be slower on Linux devices | Use it if the drive is frequently connected to Windows |
In user tests on Vero V, reported write speeds were approximately 35 MB/s with NTFS and close to 100 MB/s with EXT4 under favourable conditions. These are not guaranteed figures and depend on the drive, USB enclosure, filesystem and network, but they illustrate the advantage of a Linux filesystem well when Windows compatibility is not required.
8. Permanent USB mount using UUID and fstab
For normal use, the automatic mount under /media is completely sufficient.
If, however, the drive becomes a permanent part of the media infrastructure or we want to share it over NFS, it makes sense to define a fixed location, for example:
/mnt/movies1. Check the UUID
lsblk -for:
blkid2. Create the mount point
sudo mkdir -p /mnt/movies3. Back up fstab before making changes
sudo cp /etc/fstab /etc/fstab.backup4. Edit fstab
sudo nano /etc/fstabFor EXT4, you can add:
UUID=YOUR-UUID /mnt/movies ext4 defaults,noatime,nofail,x-systemd.mount-timeout=30 0 0
Replace YOUR-UUID with the actual UUID.
5. Always test the configuration before rebooting
sudo mount -aIf the command simply returns to the prompt without an error, check:
ls -lah /mnt/movies
Important: an incorrect entry in /etc/fstab
can cause problems during boot. Always back up the file first
and use sudo mount -a to test it.
9. Vero V as a network drive – Samba Server
Vero V can also work in the opposite direction: connect a drive to Vero V and access it from other computers.
Open:
My OSMC → App Store → Samba Server
and install Samba Server.
The OSMC Samba server then automatically shares the home folder and automatically mounted removable media.
Access from Windows
In File Explorer, enter:
\\192.168.1.50The shared folders or USB drives will appear.
In Windows, the folder can then also be mapped as a normal network drive with its own drive letter.
SMB1?
SMB1 is an old and security-problematic protocol. We do not recommend using it with modern Windows, Synology, QNAP or TrueNAS systems.
Use SMB2 or SMB3.
10. File transfer via SFTP / WinSCP
If you do not want to install Samba Server, files can also be transferred via SSH or SFTP.
On Windows, WinSCP is very practical.
Settings:
Protocol: SFTP
Host:     192.168.1.50
Port:     22
Username: osmc
Password: your OSMC password
USB drives will normally be under:
/mediawhile permanent mounts are under:
/mntSFTP is very practical for smaller administrative tasks, transferring subtitles, configuration files and backups.
For very large movie files, SMB is often faster because SFTP adds CPU load due to encryption.
11. Adding movies and TV series to Kodi
Kodi’s biggest advantage is not simply playing files, but building a real media library.
Recommended movie structure
Movies/
├── Dune (2021)/
│   └── Dune (2021).mkv
├── Oppenheimer (2023)/
│   └── Oppenheimer (2023).mkv
└── The Matrix (1999)/
    └── The Matrix (1999).mkv
Recommended TV-series structure
TV Shows/
└── Breaking Bad/
    ├── Season 01/
    │   ├── Breaking Bad S01E01.mkv
    │   └── Breaking Bad S01E02.mkv
    └── Season 02/
Adding a source
Videos → Files → Add videos → Browse
Then select the drive or mount point.
For local USB storage:
/media/MOVIESor:
/mnt/moviesThen set the content type:
- Movies for movies,
- TV Shows for TV series,
- Music Videos for music videos.
Recommendation: do not mix movies and TV series in the same Kodi source. Separate sources make content identification significantly more reliable.
12. NAS over SMB directly in Kodi
This is the simplest way to access Windows, Synology, QNAP or other SMB shared folders.
In Kodi, open:
Videos → Files → Add videos → Browse → Add network location
Protocol:
Windows network (SMB)Example settings:
Server name: 192.168.1.20
Shared folder: Movies
Username: vero
Password: ********
If you have several shared folders on the same NAS, you can enter only the server and then browse through it.
Use a dedicated account
On the NAS, we recommend an account such as:
veroIf Vero V only plays content, you can assign it read-only permissions.
This is safer than using the main administrator account on the NAS.
If the NAS does not appear in the network browser
This does not necessarily mean that SMB is not working.
Modern SMB2/SMB3 systems often do not support the old style of network discovery.
Use Add network location and enter the IP address directly.
13. SMB through a system mount and fstab
For larger UHD libraries, the network source can be mounted directly into the Linux filesystem.
Kodi then sees it as a local folder.
Example
NAS:
192.168.1.20Share:
MoviesMount on Vero:
/mnt/NAS_Movies1. Create the mount point
sudo mkdir -p /mnt/NAS_Movies2. Create a secure credentials file
nano ~/.smbcredentialsEnter:
username=vero
password=MY_PASSWORD
Save it and protect it:
chmod 600 ~/.smbcredentials3. Back up fstab
sudo cp /etc/fstab /etc/fstab.backup4. Edit fstab
sudo nano /etc/fstabAdd:
//192.168.1.20/Movies /mnt/NAS_Movies cifs x-systemd.automount,noauto,rw,iocharset=utf8,credentials=/home/osmc/.smbcredentials,uid=osmc,gid=osmc,file_mode=0770,dir_mode=0770,vers=3.0 0 0
If the server uses a different SMB dialect, a different
vers= value may be required. With some modern systems,
SMB 3.1.1 may also be appropriate.
5. Check for errors
sudo mount -aThen:
sudo systemctl daemon-reload
sudo systemctl restart remote-fs.target
6. Test
ls -lah /mnt/NAS_MoviesIf you can see the movies, the mount is working.
7. Add it to Kodi
Do not choose an SMB network location.
Select:
Browse → Root filesystem → mnt → NAS_Movies
Read-only mount
If Vero V does not need write permission, you can replace rw with:
roThis provides additional protection for the media library.
Testing the SMB server with smbclient
sudo apt-get install smbclientThen:
smbclient -L 192.168.1.20 -U veroIf a list of shares appears, the network connection and login are working.
14. NAS over NFS directly in Kodi
NFS is the native Linux network filesystem protocol and is very well suited to OSMC.
In Kodi, select:
Videos → Files → Add videos → Browse → Network File System (NFS)
If the NAS publishes an NFS export, Kodi should display it.
If automatic discovery does not work, a system-level mount can be used, which is often a faster and more robust solution as well.
15. NFS through fstab
The OSMC community has long recommended a kernel NFS mount for more demanding media libraries.
1. Check what the NAS exports
showmount -e 192.168.1.20If the command is not available:
sudo apt-get install nfs-commonExample result:
Export list for 192.168.1.20:
/volume1/Movies 192.168.1.0/24
2. Create the mount point
sudo mkdir -p /mnt/NAS_Movies3. Back up fstab
sudo cp /etc/fstab /etc/fstab.backup4. Add the mount
sudo nano /etc/fstabExample:
192.168.1.20:/volume1/Movies /mnt/NAS_Movies nfs noauto,x-systemd.automount 0 05. Test
sudo mount -a
sudo systemctl daemon-reload
sudo systemctl restart remote-fs.target
Then:
ls -lah /mnt/NAS_MoviesNFSv4
With an NFSv4-only server, it may be necessary to specify the version explicitly.
For a manual test:
sudo mount -t nfs -o vers=4 192.168.1.20:/Movies /mnt/NAS_MoviesCases have been documented on the OSMC forum where Kodi’s NFS browser did not find an NFSv4-only server, while the system-level mount worked normally.
16. Autofs – recommended for a NAS that is not always reachable
If the NAS is always powered on, fstab is generally completely suitable.
If, however, the NAS:
- is powered off,
- goes to sleep,
- reboots, or
- is occasionally unavailable,
autofs is a very good solution.
Autofs mounts the share only when someone actually accesses the folder. After a period of inactivity, it can unmount it again.
This reduces the possibility of an unavailable NAS blocking OSMC or Kodi.
Installing autofs
sudo apt-get install autofsSMB with autofs
Edit:
sudo nano /etc/auto.masterAdd:
/- /etc/auto.smb.shares --timeout 15 browseThen:
sudo nano /etc/auto.smb.sharesExample:
/mnt/NAS/Movies -fstype=cifs,rw,credentials=/home/osmc/.smbcredentials,iocharset=utf8,uid=osmc,gid=osmc,vers=3.0 ://192.168.1.20/Movies
With autofs, the mount point must not end with /.
The correct form is /mnt/NAS/Movies, not
/mnt/NAS/Movies/.
NFS with autofs
In /etc/auto.master, add:
/- /etc/auto.nfs.shares --timeout 15 browseThen:
sudo nano /etc/auto.nfs.sharesExample:
/mnt/NAS/Movies 192.168.1.20:/volume1/MoviesRestart autofs
sudo systemctl restart autofsTest
ls -lah /mnt/NAS/MoviesSimply accessing the folder triggers the mount.
Autofs diagnostics
If it does not work:
sudo systemctl stop autofs
sudo automount -f -v -d
Then, in a second SSH window, try:
ls -lah /mnt/NAS/MoviesIn the first window you will see what happens during the mount attempt.
17. SMB or NFS?
| SMB | NFS | |
|---|---|---|
| Windows environment | Excellent | Less practical |
| Linux / OSMC | Very good | Excellent |
| Username + password | Yes | Access is usually controlled by IP/UID rules |
| Simple home configuration | Very simple | Slightly more technical |
| Performance | Very good | Generally excellent |
Our practical recommendation
If the NAS is also used by Windows computers and you want simple user management:
SMB3.
If you are building primarily a Linux/OSMC media infrastructure and the NAS has a good NFS implementation:
NFS.
For very demanding 4K libraries, it is more important than the protocol itself that you use a kernel mount and a stable network.
18. Synology, QNAP and TrueNAS – recommended approach
Exact menu names change between different versions of NAS systems, but the basic logic remains the same.
Synology
- create a Movies folder,
- create a vero user,
- assign Read or Read/Write permissions,
- enable SMB2/SMB3 or NFS,
- leave SMB1 disabled.
QNAP
- create a Shared Folder,
- create a dedicated user account,
- enable SMB3 or NFS,
- limit permissions to only the required folders.
TrueNAS
- create a dataset for media,
- create an SMB or NFS share,
- configure ACLs or UNIX permissions correctly,
- add Vero as a client.
A media player almost never needs the NAS administrator account. Use a dedicated account with the minimum permissions required.
19. Measuring network speed with iperf3
If 4K video stutters, do not guess. Measure the network first.
Installation on Vero
sudo apt-get install iperf3On the NAS or computer
Start the iperf3 server:
iperf3 -sNAS → Vero
This is the most important direction for media playback:
iperf3 -R -c 192.168.1.20Vero → NAS
iperf3 -c 192.168.1.20What should you expect?
On a healthy Gigabit Ethernet connection, the result can approach 900–940 Mbit/s.
If, for example, you get:
94 Mbit/sthere is very likely a 100-Mbit connection somewhere in the path.
Check:
- the UTP cable,
- the switch port,
- the NAS network adapter,
- the router,
- any 100-Mbit intermediate switch.
If Wi-Fi results are unstable, repeat the test several times. With a wireless connection, variation in speed is important as well, not only the best measured result.
20. Recommended Kodi video settings
For a 4K television, we recommend that the Kodi user interface is not unnecessarily set to 4K all the time.
Recommended basic configuration
Settings → System → Display
Resolution: 1920 × 1080p
Whitelist: empty, unless there is a specific reason to configure it manually
Then:
Settings → Player → Videos
Adjust display refresh rate: On start/stop
Sync playback to display: OFF
When a 4K movie starts, Kodi can automatically switch the output to 4K and to the appropriate refresh rate.
Why use a 1080p user interface?
The Kodi interface does not benefit from running at 4K all the time, while doing so places more load on the device.
The content itself is not limited to 1080p because the GUI is 1080p. A 4K movie still plays in 4K.
23.976 / 24p
Movies are often encoded at 23.976 or 24 fps. Vero V can automatically switch the television to the appropriate refresh rate.
When the television changes mode, the screen may go black for a second or two. This is normal HDMI re-synchronisation.
21. Dolby Vision and HDR
Vero V supports HDR10, HDR10+, HLG and Dolby Vision.
For supported Dolby Vision content, OSMC uses TV-led, or display-led, Dolby Vision.
This means that the television performs the final Dolby Vision image mapping.
Dolby Vision Profile 7 FEL
Since 2026, the standard OSMC release for Vero V also supports Dolby Vision Full Enhancement Layer.
What do we need?
- Vero V with an up-to-date version of OSMC,
- a Dolby Vision-compatible television,
- an HDMI path that supports the required video modes,
- if an AVR is used, it must also pass the signal correctly.
Standard Mode and Low Latency Dolby Vision
For the best Dolby Vision support, OSMC requires a display that supports conventional, or Standard Mode, Dolby Vision.
Some early televisions support only Low Latency Dolby Vision, which can be a limitation.
If Dolby Vision shows incorrect colours or a black screen
- check that OSMC is up to date,
- test a direct Vero → TV connection,
- try another HDMI input,
- check the television’s HDMI Enhanced / Deep Colour setting,
- try another high-quality HDMI cable,
- check whether the problem occurs only with a particular DV profile or file,
- collect an OSMC debug log.
22. Dolby Atmos, DTS:X and HD-audio passthrough
For advanced audio settings, first change the Kodi Settings Level to:
Expert
Then open:
Settings → System → Audio
If you use HDMI and a capable AVR
Typical configuration:
Audio device: HDMI / PCM
Number of channels: 7.1
Output configuration: Best match
Allow passthrough: ON
Then, according to the capabilities of the AVR, enable:
- Dolby Digital / AC3,
- Dolby Digital Plus / E-AC3,
- DTS,
- DTS-HD,
- Dolby TrueHD.
With correct passthrough, Atmos in a TrueHD stream is received by the AVR. The same applies to DTS:X within a DTS-HD stream.
Important:
Sync playback to display must be disabled when passthrough is used.
SPDIF
Optical SPDIF cannot carry HD formats such as Dolby TrueHD and DTS-HD MA.
With SPDIF, we normally configure:
Channels: 2.0
AC3/DTS passthrough: ON
TrueHD: OFF
DTS-HD: OFF
E-AC3: OFF
Analogue output
For analogue output:
Channels: 2.0
Passthrough: OFF
23. Vero → AVR → TV or Vero → TV → AVR?
Recommended connection for a serious home cinema system
Vero V → HDMI → AVR → HDMI → TVThis allows the AV receiver to receive Dolby TrueHD, Atmos, DTS-HD and DTS:X directly.
Alternative configuration
Vero V → TV → eARC → AVRThis setup can work extremely well if the TV correctly supports HD-audio passthrough over eARC.
Older ARC
Standard ARC has considerably more limitations than eARC and generally does not carry lossless Dolby TrueHD/DTS-HD MA in the same way.
If Atmos does not work through the TV, temporarily connect Vero directly to the AVR. This quickly shows whether the TV is the limiting factor.
24. HDMI-CEC
Vero V supports HDMI-CEC, so in many systems you can also use the television’s remote control.
You can find the settings under:
Settings → System → Input → Peripherals → CEC Adapter
Depending on the equipment, CEC can enable:
- control of Vero V with the television remote,
- automatic HDMI input switching,
- turning the television on,
- putting the television or AVR into standby.
If devices start turning on or off unexpectedly, limit the CEC options and enable only the functions you actually want.
25. OSMC remote and useful shortcuts
The OSMC RF remote control also supports long-press functions.
During video playback
- long Left: adjust audio delay,
- long Right: adjust subtitle delay,
- long Play: subtitles on/off,
- long Stop: subtitle settings,
- long Menu: audio settings,
- long Back: stop playback.
On the home screen
Depending on the CEC configuration, Home or a long press on Home can send a CEC activate source or standby command.
Pairing the remote again
Press and hold:
Home + OKUSB 3.0 and RF interference
Under certain conditions, USB 3.0 devices can cause RF interference in the 2.4 GHz range and thereby reduce the range of the OSMC remote.
If you notice a problem:
- pair the remote again,
- move the USB drive away from Vero V,
- use a high-quality USB cable or extension cable,
- do not hide Vero V directly behind other devices.
26. Subtitles
Kodi supports both embedded and external subtitles.
External SRT files
The most reliable approach is for the subtitle file to use the same name as the movie:
Dune (2021).mkv
Dune (2021).sl.srt
Dune (2021).en.srt
Subtitle delay
During playback, use a long press on the right button on the OSMC remote and adjust the timing.
Language settings
In Kodi, you can set preferred audio and subtitle languages, which is very practical with multilingual MKV files.
27. Bluetooth devices
Vero V has Bluetooth 4.0.
Management is available under:
My OSMC → Network → Bluetooth
Procedure:
- enable Bluetooth,
- enable discovery,
- put the device into pairing mode,
- select the device from the list,
- confirm the connection or PIN.
This can be used to connect certain keyboards, mice, controllers and other supported devices.
28. OSMC backup
Once Vero V is fully configured, create a backup.
Open:
My OSMC → Backup
OSMC allows you to back up user settings and schedule backups.
Where should the backup be stored?
We do not recommend keeping the only copy on Vero V’s internal storage.
Suitable locations include:
- a NAS,
- a USB drive,
- another computer.
Before a major update
Create a fresh backup.
A My OSMC backup is a backup of settings and user data, not necessarily a bit-for-bit image of the entire internal eMMC drive.
29. Reinstalling OSMC
If the system is no longer stable because of experimentation or a damaged configuration, OSMC can be reinstalled.
What you need
- a USB flash drive or microSD card,
- a computer,
- the OSMC installer,
- a settings backup.
Procedure
- prepare installation media for Vero V on a computer,
- power Vero V off,
- insert the USB drive or microSD card,
- power Vero V on,
- the installer appears on the screen,
- after completion, follow the first-run wizard.
Warning: reinstalling formats and repartitions Vero V’s internal storage. Create a backup before you begin.
After a clean installation, update the system first and only then restore the backup, especially if the installation image is older than the release that was previously installed.
30. Logs and diagnostics – the most important troubleshooting tool
If Vero V does not play a particular file or another problem appears, randomly changing settings often only hides the real cause.
Enable debug logging
Settings → System → Logging → Enable debug logging
Then reproduce the problem again.
My OSMC Log Uploader
Logs can be uploaded through My OSMC, which provides a link that can be added to a post on the OSMC forum.
If Kodi is not working
Over SSH:
grab-logs -AOSMC creates a URL containing diagnostic information.
If the problem occurs only with a particular video file
In addition to the log, it is useful to include a MediaInfo report. This shows:
- codec,
- profile,
- bit depth,
- HDR/Dolby Vision profile,
- audio codec,
- bitrate, and
- container.
31. Most common problems and solutions
The NAS does not appear in Kodi
Do not use automatic SMB network browsing as the only test.
Try:
Add network location → SMB → NAS IP addressIf you have SSH access:
smbclient -L 192.168.1.20 -U veroSMB reports Permission denied
Check:
- the username,
- the password,
- the user’s permissions on the NAS,
- the folder ACL,
- the SMB version.
The SMB mount does not work after a reboot
Check:
sudo mount -a
journalctl -b | grep -i cifs
If the NAS is not yet reachable during boot, use
x-systemd.automount, Wait for Network,
or, even better, autofs.
NFS does not appear in the Kodi browser
With NFSv4-only configurations, automatic discovery is not always reliable.
Check the exports:
showmount -e 192.168.1.20and then create a kernel mount.
A 4K movie stutters
First run:
iperf3 -R -c 192.168.1.20If you get only about 90–95 Mbit/s on a wired connection, there is almost certainly a Fast Ethernet link somewhere instead of Gigabit Ethernet.
Also check:
- the SMB/NFS mount method,
- NAS performance,
- the cable,
- the switch,
- the bitrate of the problematic video.
Dolby Atmos does not appear on the AVR
Check:
- Kodi Settings Level = Expert,
- Allow passthrough = ON,
- TrueHD capable receiver = ON,
- DTS-HD capable receiver = ON, if supported,
- Sync playback to display = OFF,
- temporarily connect Vero directly to the AVR.
Audio works, but Atmos does not
Check whether the audio track is actually Dolby TrueHD + Atmos. Atmos can also be carried in Dolby Digital Plus, so it is important to know which format the file actually contains.
Black screen when a movie starts
A short black screen at the beginning or end of playback can be completely normal.
The television may be switching:
- resolution,
- refresh rate,
- HDR mode,
- Dolby Vision mode.
If the black screen remains, check the HDMI cable and AV receiver.
Dolby Vision has green/purple colours
This usually points to incorrect DV processing or an incompatibility involving a specific profile, file or HDMI path.
Test the same file with a direct Vero → TV connection and collect a debug log.
The USB drive does not appear
Over SSH:
lsblk -f
blkid
dmesg | tail -50
If lsblk sees the drive but Kodi does not, the problem is different from
a situation where the system does not detect the drive at all.
The USB drive gets a different folder name
With removable automounts, OSMC uses the drive label.
For a permanent library, it is therefore better to use a UUID mount under
/mnt.
The remote suddenly works less reliably
If a USB 3.0 device has just been connected, physically move it away and pair the remote again with Home + OK.
SSH refuses the connection after reinstalling
ssh-keygen -R 192.168.1.50Then establish the connection again.
Vero V plays 4K, but the interface shows 1080p
This can be correct and is even recommended.
The Kodi GUI can run at 1080p, while when a 4K movie starts the output automatically switches to 2160p.
The NAS occasionally powers down and Kodi freezes when accessing it
For this scenario, use autofs instead of a classic permanent mount.
32. Frequently asked questions
Is SMB or NFS better for Vero V?
Both are good. In a mixed Windows environment, SMB3 is usually simpler, while in a Linux/NAS environment NFS is a very efficient solution.
Do I have to use fstab?
No. For a normal user, Kodi SMB/NFS access is completely sufficient. A system-level mount is mainly interesting for demanding libraries, high bitrates and advanced configurations.
When should I use autofs?
When the NAS or computer is not always powered on or goes to sleep.
Can I connect a USB HDD to Vero V?
Yes. Vero V has USB 3.0, and OSMC normally mounts the drive automatically
in the /media directory.
Which filesystem do you recommend?
For a drive that will remain permanently connected to Vero V, EXT4. For a drive that is also frequently connected to Windows or macOS, exFAT.
Can I see a drive connected to Vero V from a Windows computer?
Yes. Install Samba Server from the My OSMC App Store and access Vero
through \\VERO-IP-ADDRESS.
Do I need a static IP?
Not necessarily. We recommend a DHCP reservation on the router.
Does Vero V support Gigabit Ethernet?
Yes.
How can I check whether Gigabit Ethernet is really working?
With iperf3. A healthy Gigabit connection can approach
approximately 900–940 Mbit/s.
Does the Kodi GUI have to be set to 4K?
No. For a typical setup, we recommend a 1080p GUI and Adjust display refresh rate set to On start/stop. 4K video still plays in 4K.
Does Vero V support Dolby Atmos?
Yes, including bit-perfect Dolby TrueHD/Atmos passthrough to a compatible AV receiver.
Does it support DTS:X?
Yes, through DTS-HD passthrough to a compatible AVR.
Does it support Dolby Vision?
Yes. Vero V supports TV-led Dolby Vision, and current OSMC also supports Dolby Vision FEL.
Why must Sync playback to display be disabled?
Because it is not compatible with normal bitstream audio passthrough operation.
Where is Kodi data stored?
The OSMC user’s Kodi directory is:
/home/osmc/.kodi/.
Where is advancedsettings.xml?
The user file is located at:
/home/osmc/.kodi/userdata/advancedsettings.xml.
Can I use Vero V without Linux knowledge?
Yes. Most users never need SSH or the command line at all.
Our recommended Vero V configuration
For a more demanding home media installation, at varnaPot.si we would use the following architecture as a starting point:
NAS
 │
 │ SMB3 or NFS
 │
Gigabit / 2.5 GbE network switch
 │
 │ 1 GbE
 │
OSMC Vero V
 │
 │ HDMI
 │
AV receiver
 │
 │ HDMI
 │
4K HDR / Dolby Vision television- The NAS and Vero V have DHCP reservations.
- Vero uses wired Gigabit Ethernet.
- The NAS has a separate user account for Vero.
- For an always-available NAS, use a kernel NFS/SMB mount.
- For a NAS that powers down, use autofs.
- Set the Kodi GUI to 1080p.
- Set Adjust display refresh rate to On start/stop.
- Leave Sync playback to display disabled.
- Send HD audio directly to the AVR.
- Create a backup after configuration is complete.
Conclusion
OSMC Vero V can be a very simple media player, while at the same time being open enough to become the central playback endpoint of a very advanced home cinema system.
For a beginner, a USB drive or an SMB folder added directly to Kodi is enough.
An advanced user can use NFS, SMB kernel mounts,
fstab, autofs, SSH, SFTP,
Samba Server, automation and other Linux functions.
This combination of simple everyday use and an open Linux system is one of Vero V’s greatest strengths.
Once the network, NAS, video output and audio passthrough are configured correctly, everyday use of the system is very simple: select a movie and press Play.
OSMC Vero V at varnaPot.si
If you are still deciding whether Vero V is right for you, you can also read our detailed overview article or view the device in the online store.